Sunday, December 4, 2016

Holiday Project: LED Flip Light

The original idea for this project came from David Bakker at draailampje.nl ("draailampje" means "flip light" in Dutch) via Make: - I've modified it slightly.  My kids both like to solder, so I wanted a project which my youngest could do mostly by herself.


Parts:

The idea of the flip light is very simple: parts needed are a CR2032 battery, a coin battery holder, a tilt switch, and a 10mm diffused LED.


This assembly is mounted into the lid of a small hexagonal glass jar with hot glue.  We built 20 of them in assembly-line fashion, with me acting as safety observer and occasionally suggesting that she re-solder some joints.

Operation is dumb simple; flip the light over to turn it on, back again to turn it off.

The CR2032 battery drives the LED directly - no current-limiting resistor is needed.  You have to make a choice about orientation - David Bakker's original design is to have the light on when the lid is up.

My daughter decided to have it on when the lid is down, with the LED pointing up when on, so that the light comes out the bottom of the jar.  She felt this was more "pretty".

The end result was really nice - she tossed a few on the mantle, put some on the dining room table, and gave a few away as gifts.

The most expensive parts of the project were the glass jars.  You can get them for about $1 each if you buy a box of 24.  Parts list above.

Update: LED Hack for Christmas Houses

2016 Update: Updated links to parts sources - some had broken since the original post.  Also: For a festive touch, we use color-changing LED tea lights in the Fezziwig building.  That guy knew how to party!

Last weekend my wife and I started getting the Christmas decorations out of storage.  One of my wife's holiday favorites is a set of Dickens-style houses/buildings, some have signs like "Scrooge & Marley" "Fezziwig" etc.  Each has a C7 lamp and a cord.  Given the number of houses she has, cord management is always an issue.  We wind up trying to hide them with fluffy "snow" fabric, and then we have to hide a socket-strip and all the plugs.  The lights get hot, so in proximity to the fabric there's always a fire risk if one of the lights were to pop out.  The houses are fun, but it's a huge mess, so we decided to homebrew some LED lights for them.

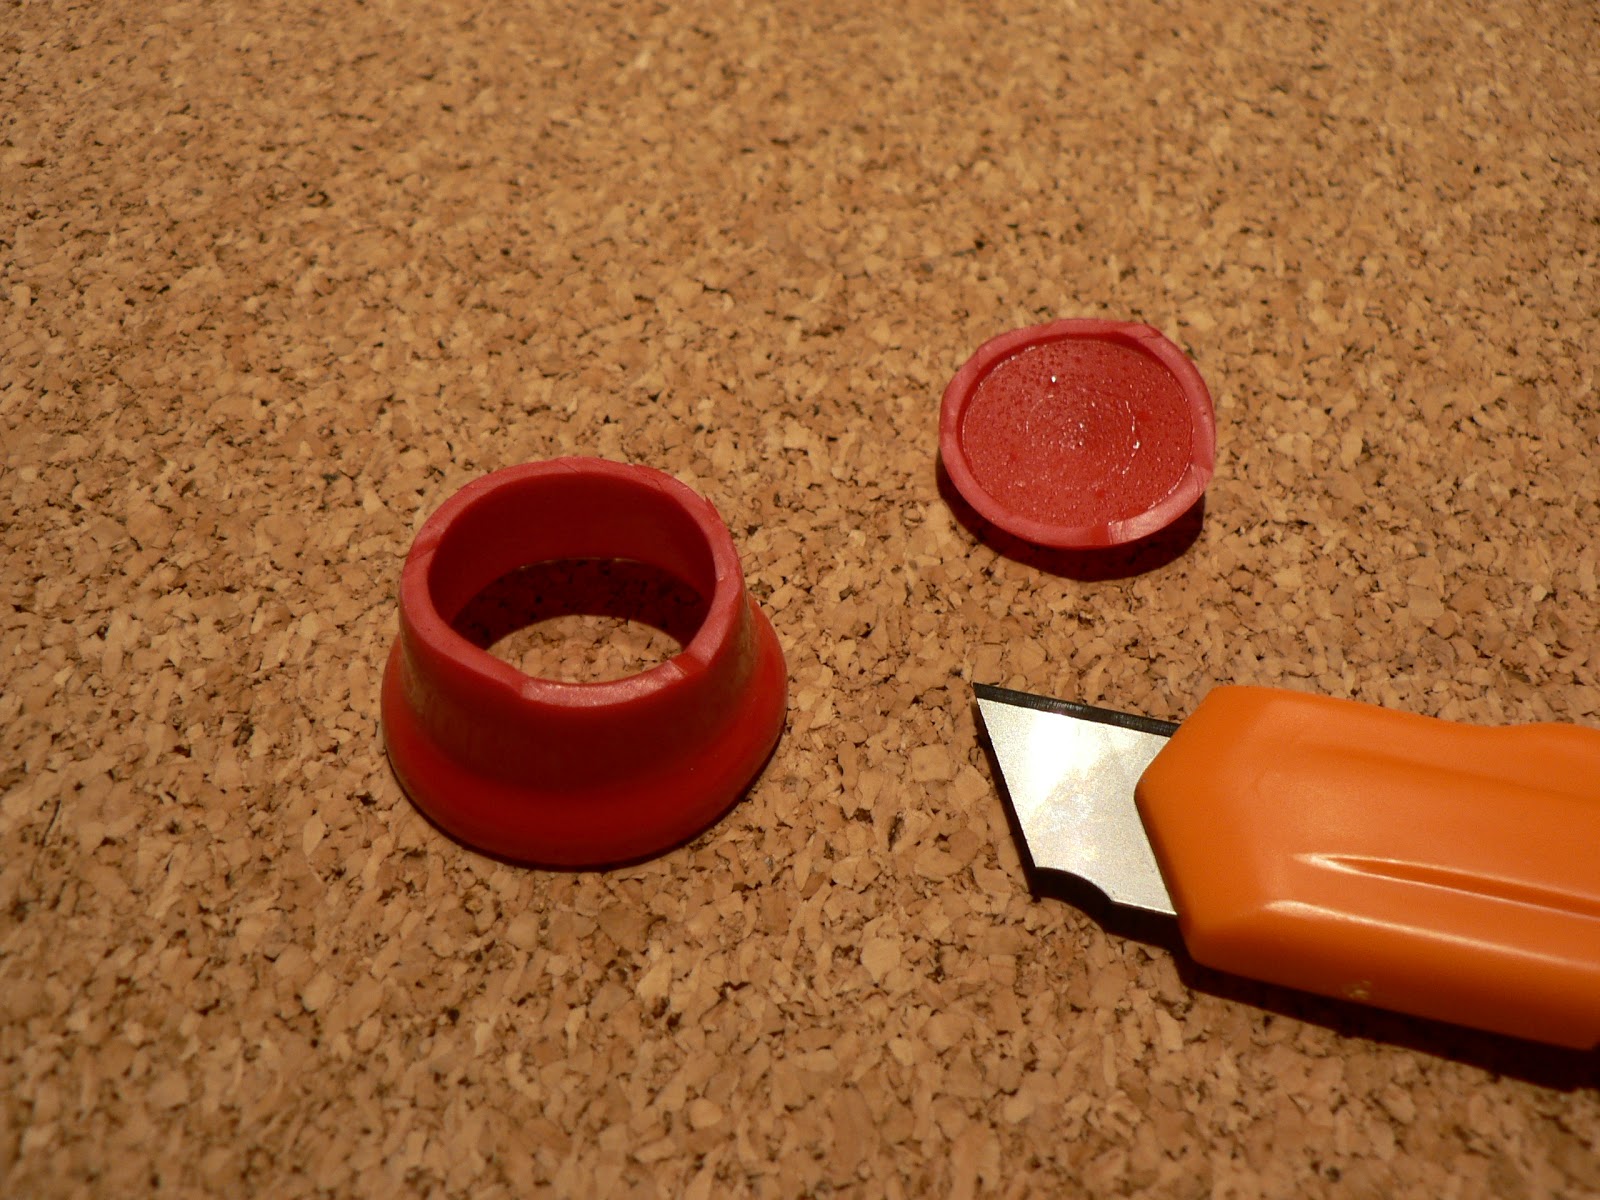
Top removed from thread protector
We started by buying a set of small submersible LED tea lights.  These typically come in packs of 10 - 12, are used for weddings and such (toss them in the bottom of the punch bowl, etc), and cost about $0.80 each.  You can get them in white, color-changing, or a mixed set.  Each light uses a couple of CR2032 batteries, so we picked up a pack of 20 for under $8.00. The lights arrived with batteries, and only one of them was depleted, so we were good to go.  We also discovered that a color-changing light had got mixed into our set of white lights, which the kids decided was really cool because that house "looks like they're having a party". 

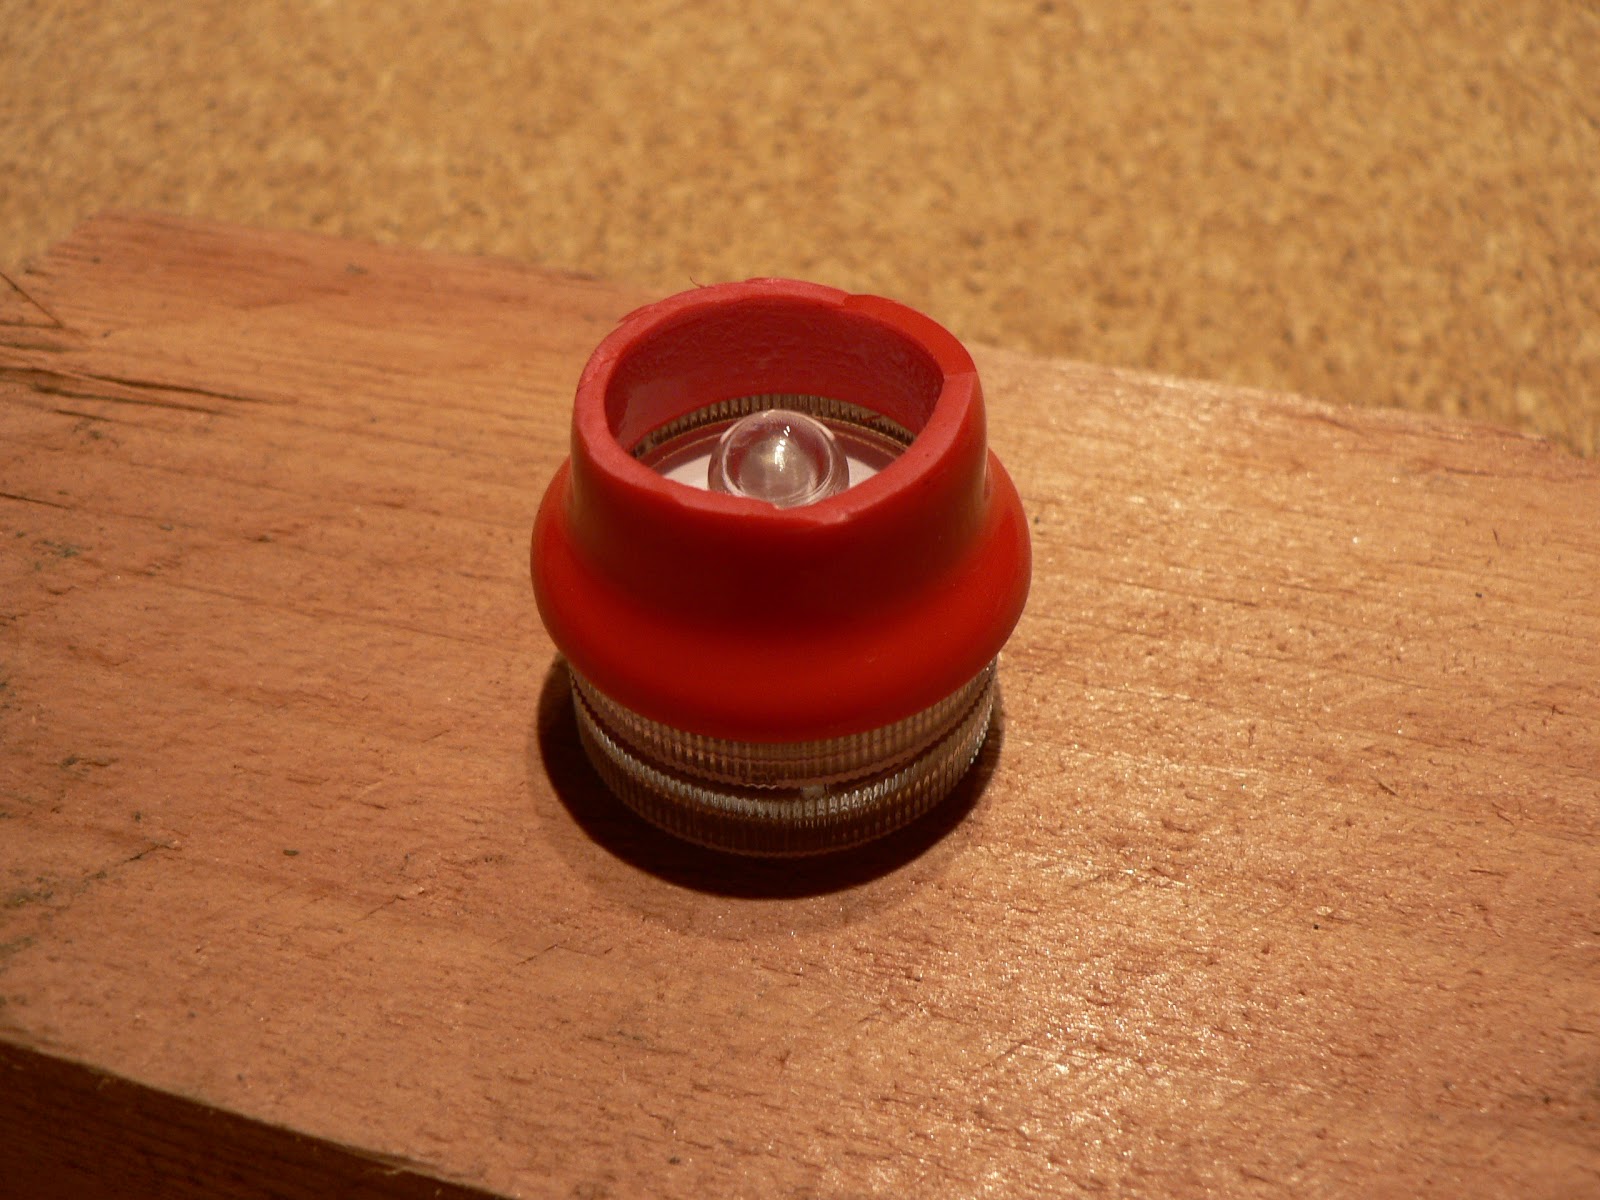
LED glued into thread protector
As it turns out, some of her houses have larger openings for the C7 lamps, so we just set the light on the table and put the house on top of it.  The others had smaller openings, so I needed to hack something up.  We considered using modeling clay, but I thought that might get messy.  Sugru or InstaMorph (moldable rubber) would have been great, but I used all my Sugru to make a custom mount for a Wii sensor.  Then I remembered that I had a bag of pipe thread protectors left over from an amateur radio antenna install - I use them to make custom grommets for my coax cable ingress box.
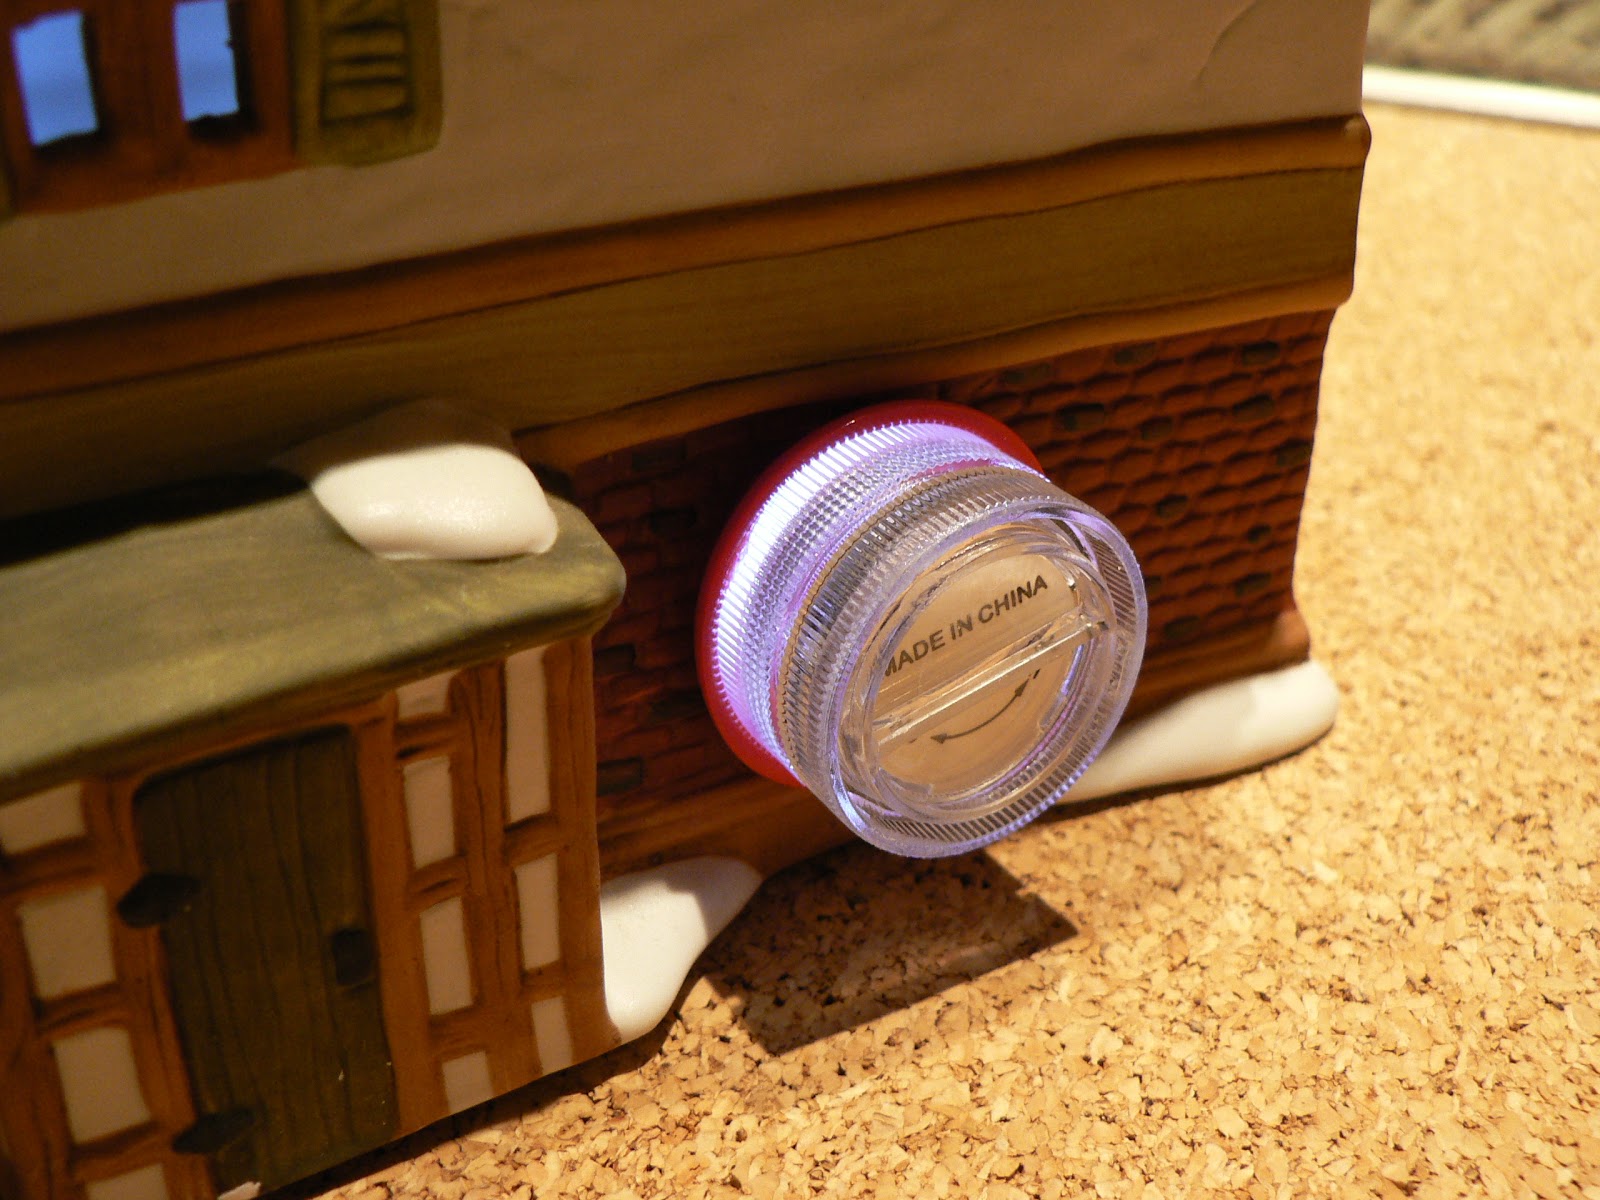
Perfect fit!
As it turns out, the LED lights friction-fit perfectly into thread protectors.  So I sliced off the end to expose the LED.  I put a few drops of hot glue on the thread protector to secure the LED.  They fit perfectly into the holes where the C7 lamps used to go, and they put off good light.

We're pleased with the end result, but if I had to make a change I would use amber/yellow LEDs instead of the pure white we have now.  Maybe over time I'll swap in some of those if the white ones fail.  In the meantime, our Dickens Village is lit up with no cords or concerns about fire danger. 

Wednesday, November 30, 2016

Earthquake Go-Kit - Pirate Radio?

In the wake New Zealand's recent Kaikōura earthquake, locals have been relying on an FM radio station called "Brian FM 100.3" to provide them with news about where to find food, running water, and toilets.  The broadcasters set up a similar radio station in the aftermath of the 2011 Christchurch earthquake.

Radio New Zealand article

In the US, this would probably be unnecessary - most of our broadcast stations have well-engineered towers, backup towers and power sources, and redundant studios.  New Zealand likely has a lot of idle FM spectrum, even when there's not an earthquake, so the Brian FM network can move around as needed to provide coverage and information to hard-hit or remote areas.

Monday, November 28, 2016

Build a (fire)wall and make China pay for it

I've been gradually building up a Raspberry Pi for use in my shack, and I've also been experimenting with a home control and security systems hosted on Pi platforms.  To be really useful, a home control system needs to be accessible from outside my home, and a remote radio setup would also be nice.  This has led me down a path of learning about how to conveniently but safely expose ports on my Pi platforms to the internet.

At any given moment, there are thousands of attackers active on the internet.  If you expose ports like TCP 80 (web server), or TCP 22 (ssh) you will be attacked, likely within minutes.  These attacks range from sophisticated hack attempts carried out by state-sponsored security teams, to teenagers running automated scanners that look for obvious weaknesses like unmodified default passwords.

Most attacks try to leverage brute-force methods - they start with a presumption that the superuser login is "pi" (the default) and work through a list of obvious passwords like the default "raspberry", or "pi", or "password", or "123456", etc.

Presuming you've changed your superuser password (and ideally your login name) an easy method to add security is to implement fail2ban.  The fail2ban method tracks failed login attempts over time, and if the same IP address fails more than X times within Y minutes, that address is then added to a ban list in iptables.  If your password is non-obvious, this works fairly well.  The problem is that, without additional setup, iptables exist in memory and are wiped on every reboot.  And because they exist in memory, you'll ultimately waste Pi resources trying to exclude billions of IP addresses.  It's possible to preemptively ban ranges and subnets of IP addresses, but you're still talking about nearly 8,000 entries just for a single country like China.  Also; fail2ban only works if someone actually attempts a login - it does nothing about attackers who probe connections without logging in.

The reality is, the number of IP addresses from which I want to allow connection is very small, and (unless I'm traveling) they're all US-based.  So the trick is to only allow connection from IP addresses originating in the US.  Turns out this is possible using GeoIP and some scripting.  The GeoIP method uses a file database of IP address ranges listed by country.  When an ssh client connects, their IP address is compared with the database.  If the IP address is not from the US, it refuses the connection.
I still run fail2ban, to handle any US-based attackers, and to deal with any non-ssh traffic.  Let me know in comments if you use GeoIP for security, and what you think of my strategies.

Wednesday, September 14, 2016

Nexus 6 Review: Wi-Fi Done Right

I've been a Droid user for many years.  Started out with the Droid 1 then onto a Droid 2, Droid RAZR Maxx, Droid Ultra, a very short-lived and painful experience with the Droid Turbo, then a Droid Maxx which is essentially a slightly fatter Ultra with more battery.  When my battery's capacity started to run short, I started looking at other phones.  I decided to get a Nexus 6 (unlocked from Amazon) when Google announced that they would roll out Wi-Fi Assistant to all Nexus phones.

Wi-Fi Assistant was originally a Google Fi feature that applies a VPN to open Wi-Fi access points - without user intervention.  In fact, Wi-Fi Assistant is now (once you have the Play Services 9.6 update) capable of securing all open Wi-Fi, even ones where you manually connect.  This is a huge move by Google that will hit the cellular carriers hard because if I'm able to use public Wi-Fi with confidence, and my phone is latching on to open Wi-Fi by itself - why do I need a large data plan?

This all takes Wi-Fi a step closer to being a viable alternative to cellular data, although there are still many issues.  The problem is that managing a Closed SSID network is painful and complex, and Open SSID networks are subject to abuse.  Wi-Fi also suffers from a handoff problem (i.e. it has no handoff method) and it's fairly easy to do a man-in-the-middle attack in coffeeshops - without 802.1X there's no way to know if that "xfinitywifi" hotspot is really Comcast or not.  Wi-Fi Assistant solves that problem by providing a VPN back to Google's servers.

zOMG so fast!
So far I'm very happy with the Nexus 6.  It's a two year old design but it feels quite snappy.  Google's clearly still putting effort into development, and the Android is pure - no Verizon or Motorola/Lenovo weirdness.  It's a bit larger than I'm used to, so I'm glad I didn't get the Nexus 6P, but I have large hands so it works for me.  Wi-Fi in the 5 GHz band using 802.11ac on the Nexus 6 is fast.  It easily maxed out my 75 Mbps DSL connection in a speed test.

For a while I'd been using an iPad in the evening because the screen was much better than my Droid Maxx.  Now the iPad sits forgotten for days at a time, as I find the Nexus 6 screen good enough to handle almost anything.

Sunday, September 4, 2016

K6BJ - 100 Years of amateur radio in Santa Cruz

The K6BJ amateur radio group is celebrating it's centennial on September 17th, and the Santa Cruz Museum of Art & History.  Information can be found at www.k6bj.org - come to the coast and celebrate a century of amateur radio tradition in Santa Cruz County!

  • September 17, 11:00am - 3:30pm
  • FREE Admission

Santa Cruz Museum of Art and History
705 Front Street
Santa Cruz, CA 95060

Thursday, August 25, 2016

Workbench: Screw Terminal Adapters and Lever-Nuts

Having collection of connectors with screw terminals or lever clamps is very useful.  In a pinch you could do a field-repair on a headset, a rig interface, or resurrect a broken power cord with just a pocket knife and a screwdriver.  Here are some of my favorites:

DC Barrel Connectors - these can be used to make a quick disconnect (in lieu of a switch) or an extension cord.  If you just want the plug to match an existing device, you'll have to measure the outer diameter and inner pin.  Most of the time the outer dimension is 5.5mm, and the inner pin is either 1.7mm, 2.1mm, or 2.5mm.

2.1 x 5.5mm paired DC Barrel Connectors
http://amzn.to/2bEavs4

TRS "Phono" Connectors - these are really useful for building test cables or attaching a rig interface to the ADC port on an Arduino or ESP8266.  When you get to the mountain for a SOTA activation and realize your 5 year-old has yanked the end off your headphones, you'll want one of these.

1/8" (3.5mm) Tip-Ring-Sleeve "phono male" plug
http://amzn.to/2bjqfOS

1/8" (3.5mm) Tip-Ring-Sleeve "phono female" jack
http://amzn.to/2bj6JVy


For pocket tools, I prefer the Leatherman ES4 Squirt.  (http://amzn.to/2bEe5lV) It's a ham's dream tool, with a wire stripping jaw, knife, scissors, file, and a screwdriver bit that works well on these screw terminal adapters.


Other interesting stuff....

Wago Lever-Nuts - these are really useful for quick repairs or experiments where you want to easily connect and disconnect wires.  You can use them to quickly add sections of wire for tuning dipole antennas.  Lift the lever, slide in a wire (or wires plural) and drop the lever - done.  Made a mistake?  Lift the lever, change, drop the lever.  They'll handle up to 400 VAC and 20 amps, so they can be used for household electrical repairs or rig power cords.  I keep a handful of these in my field bag, some my glove compartment, and a bunch on my bench.  I prefer the newer 221 Series because the lever is wider and easier to manipulate.
http://amzn.to/2bEcNY3

BNC Female w/ screw terminal - these are 75 ohm, designed for CCTV installs, but for receiver testing or low-power transmit they'll work OK.  Be aware that some adapters like this actually have baluns, which you don't want for RF testing.
http://amzn.to/2bE9Yq1

RJ45 screw terminal plug - kinda bulky, but it's great for designing cables on a bench.  When I'm done and have a working design, I build a real cable using CAT6 and an RJ45 crimper or a punch-down terminal block.
http://amzn.to/2bJ6pxr


Sunday, August 21, 2016

Repost: How to fix a Toyota Brake Light

Note: This is a repost/update from my old blog. 

Toyota Highlanders are well made cars - I bought a 2004 for my wife who later upgraded to a Sienna minivan, so I took the Highlander for myself.  It's at 130,000 miles and still going strong.  However, apparently they have a known problem where the brake lights on one side will intermittently stop working.  I've had people pull up next to me at stop lights and tell me I have a light out, then I get home to find the light is fine.

Then recently the light went out and stayed out.  I replaced the bulbs but they remained out.  Fuses were fine, my trusty Fluke 77 said voltage was getting to the assembly.  Posters in Toyota forums said that dealers are asking $40 - $140 for diagnostic, plus possibly $300 to replace a "circuit board"...?  Sounds like a scam to me.

I did some searching online and found reference to how the contacts on the bulb holder will get compressed and not make proper contact. (Kudos to Berto for the original post and Kujath for the photos.)  Kujath suggested using a flat-blade screwdriver to bend the contacts a bit, but I think a needle-nose pliers works better since you can control the amount of bending.  I did both bulb holders and the lights are working just fine. 

Monday, August 15, 2016

Use It or Lose It : Google makes a play for part of the 3.3 GHz amateur band

I've presented several times at Pacificon on the topic of spectrum auctions and the threat to amateur radio's allocations.  In my talk Ham Radio Must Die (So It Can Live) at Pacificon 2010, I specifically talked about the threat to the 3300 - 3500 MHz band.  The threat increased exponentially when the FCC converted the 3500 MHz band to the Citizen's Broadband Radio Service for use in heterogenous networks and densified mobile data systems, and now Google is asking the FCC for permission to test a wireless last-yard technology for delivering Google Fiber service in the upper half of the 3300 MHz band.

In my Pacificon talk I pointed out that the 3300 MHz band is almost never used, and the possible auction valuation to commercial users is very high.  If we presume a $2 per MHz-POP auction price (which is about what the AWS-3 commercial carrier spectrum went for) and a US population of 320 million, the value of the 3300 MHz band is $128 billion.  The AWS-3 auction, record-setting though it was, only raised $47 billion.  For a government $19 trillion in debt, $128 billion isn't much but it's a start.  Google could afford to buy that spectrum, and with the unprecedented access it enjoys due to the revolving door between itself and the White House, it has the political clout to make this happen.

There are just over 800,000 licensed amateur operators in the USA.  $128 billion puts the value of our 3300 MHz band at $160,000 PER OPERATOR.  For something we never use.  I'd be willing to say (and I'm being very charitable in this estimation) that 0.1% of all US operators make use of the 3300 MHz band.  That's $160 MILLION PER ACTIVE OPERATOR.

I'm not saying what Google's doing is right.  If you think it's wrong, file comments with the FCC.  I'm saying what they're doing is not surprising, and that I predicted this would happen six years ago.

Thursday, July 7, 2016

HamRadio360 Bling

Came home today to find a package.  Inside was a HamRadio360 sticker and a hat - and the hat is personalized my callsign!

Want a hat for yourself?  Shop now